 |
| The AA tank on the right has an integral base, all others had bases added by me. |
 |
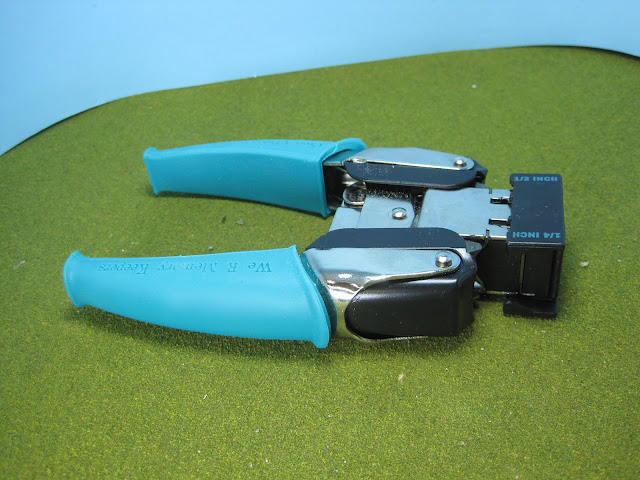
| The new tool a device to cut corners, to round them off. |
Finally making some progress on my 20mm WW2 stuff assisted by this tool.
I have started work on some Canadian and British forces, and some American stuff. Primarily I have been painting armour, mostly Sherman tanks but occasionally some other tanks and some soft skin vehicles. Pictured are some British armour and APCs. I have been following the guidelines in the Flames of War Colours of War book but also some info from various YouTube channels. Also rather independently of any source I have started to use a filter technique on all vehicles using some of the Vallejo washes dark green (for the British) and olive green (for the Americans)
The pictures demonstrate the WIP status, a lot of the weathering has been done, but some details and decals need to be added.
Most of the vehicles that I am painting have no bases but I have decided to add bases to everything. The reason for this is two fold, one I do have a fair amount of Raventhorpe RTR vehicles, they all come on bases and secondly many of my tanks are old plastic kits and the rubber treads are breaking down and becoming very fragile, bases will help protect them. I am thinking that they do not look too bad with baes and I figure it may be useful to tuck status markers under the tanks, on the base, and these markers will better travel with the tank when it is moved.
Originally I was going to order MDF bases but the sheer variety & number of required base sizes put paid to that idea. Instead I turned to the stacks of 2mm thick cardboard that my wife had brought home from work. She used to work in payroll and this cardboard was the backing board for the various payroll forms. They are legal sized and quite firm, but pliable enough to easily correct any bending that might occur after the basing material has been added.
I am going with a minimalist approach to greening up the bases I figure adding more will be easier than taking it off should I want anything greener. I am trying to match up the bases to the RTR vehicles that I own, though I did make certain that the Shermans were on bases that could still fit into a LCM landing craft. Lately my basing has started to take on a more labour intensive form. I start with my basing mixture spread over the base. This is then dry brushed with two lighter shades of brown (craft paint territorial brown and burlap). Then Vallejo sepia wash is applied daubing up any excessive amounts with a paper towel, if needed. Once dry another dry brushing is applied. (raw sienna followed by Iraqi sand) Then the vehicle is glued down, white glue randomly applied and grass sprinkled on the base.
This is a heavy duty corner trimmer that I got from Michael's. Now the good thing about Michael's is that you get to create your own sales as you can almost always find a 30-40% off coupon online. In this case it was a 40% off coupon that brought it down to only pricey as opposed to outrageous! With this you can cut 1/4" or 1/2" corners with a fair amount of ease. The 2mm thick cardboard does mean that I have to exert some effort to make the cut but it is still quicker and better than me trying to cut a curve by hand.
 |
| These are 1/4" cuts |


Thanks for the tip about the corner trimmer from Michael's, it works on 3mm thick plastic bases with some effort.
ReplyDelete